Nanomatter - Building the frontend
A follow-up to the Nanomatter controller post: building a React dashboard to control Matter-powered lamps.
- published
- tags
- #Matter #Iot #Docker #Homelab #Raspberry-Pi #React #Typescript
- categories
- Homelab
The
previous post
left things at a good but inconvenient place: the controller was running, both lamps were commissioned, and every API endpoint worked. Controlling them meant curl-ing from a terminal. The next natural step was to work on the UI.
This post covers the frontend dashboard I built. It’s a fairly standard React app, so I’ll skip the parts that aren’t interesting and focus on the bits that required some thought.
Tech stack #
I used React with TypeScript and Vite, MUI for most of the UI components, Tailwind utility classes for layout and spacing. React Query handles all server state and Axios is used for HTTP calls.
I also made a small update on the backend: now I have a small SQLite database on the Pi that persists room definitions and device metadata (display names, which room a device belongs to).
Dashboard #
The main view is a rooms page. Each room is a card listing the lamps assigned to it, with on/off toggle and a button to open the edit modal. New rooms can be added from a button at the top. Lamps can be moved between rooms from inside the modal. There are two dropdowns on the main page: one to commission new devices and one to create new rooms.
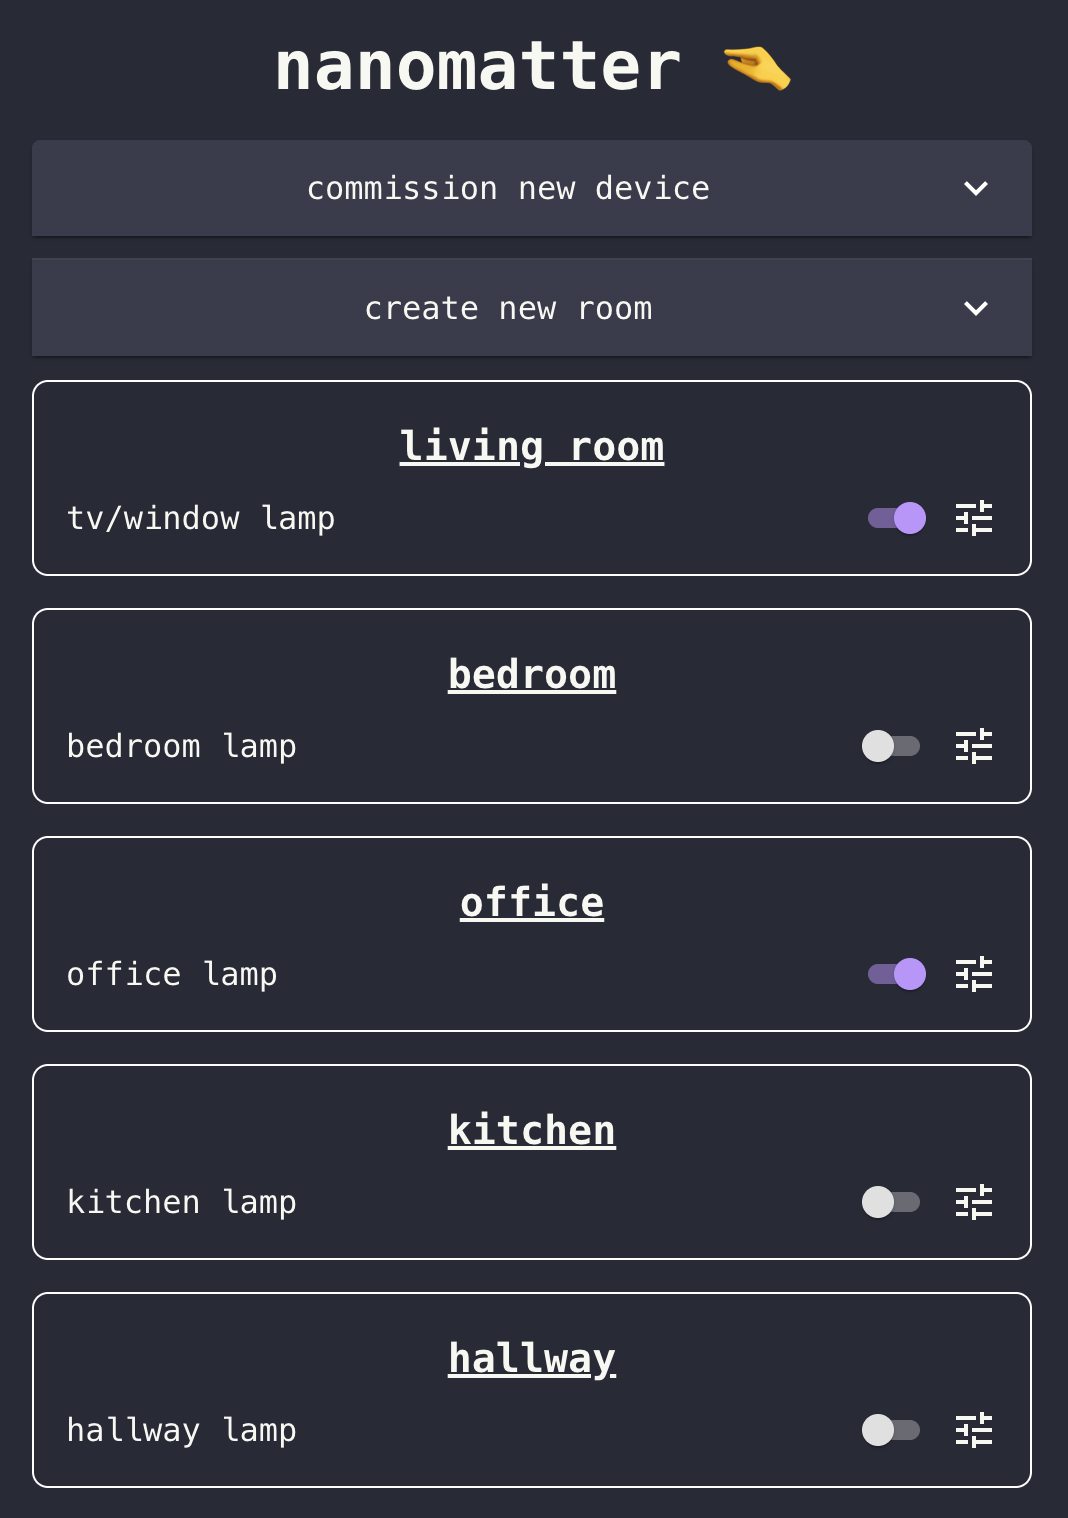
Nanomatter’s home page
Commissioning a new lamp #
This is the one UX flow that’s non-trivial. The commissioning endpoint is async — as described in the previous post, it returns a jobId immediately and does the actual work in the background. So the frontend needs to drive that polling loop.
The flow: the user opens a commission dialog, enters a pairing code and a display name, and hits submit. The frontend calls POST /api/devices/commission and gets back a jobId. It then polls GET /api/devices/commission/:jobId every 2 seconds until the status is either completed or failed.
export async function commissionDevice(
  pairingCode: string,
  deviceName: string,
): Promise<{ jobId: string }> {
  const res = await client.post(`/devices/commission`, { pairingCode, deviceName })
  return res.data
}

export async function getCommissionStatus(
  jobId: string,
): Promise<{ status: 'pending' | 'completed' | 'failed' }> {
  const res = await client.get(`/devices/${jobId}/commission`)
  return res.data
}
React Query’s refetchInterval makes the polling side straightforward: set it to 2000 while the status is pending, set it to false once terminal.
Commissioning can take up to 15 seconds on a good day and longer on a bad one, so the UI shows a spinner with a status message. If it fails, the error from the job response surfaces directly.
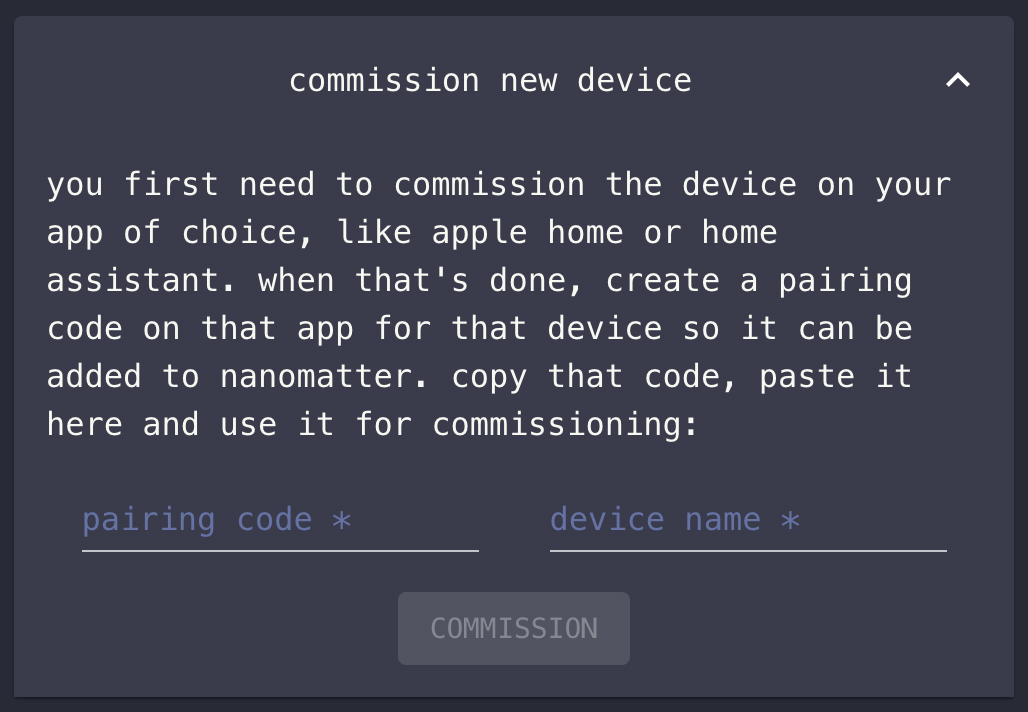
Dropdown used to commission a new device
Rooms #
Every device must be part of a room. However, when a new device is commissioned it goes to “⚠️ no room ⚠️” - a dynamic room used to accommodate devices while they don’t have rooms. We can easily create a room using the ‘create new room’ dropdown. Then, by clicking the device’s config button we can move it to that room.
Demonstration of how creating a new room and moving a device to it works
The lamp edit modal #
Clicking the config button on any device opens the edit modal. At the top it shows the device name — clicking it turns it into an inline text field so you can rename it. Below that, two lines of metadata: the room the device currently belongs to, and the factory name (the model string reported by the device itself, e.g. WiZ A.E27).
The main controls are three things laid out side by side: a brightness slider on the left (0–254, white gradient background), a color wheel in the center, and a color temperature slider on the right (150–500 mireds, blue-to-orange gradient). All three are disabled when the device is unreachable.
Below the controls, a room dropdown lets you move the device to a different room. And at the bottom, a decommission button — which asks for confirmation before doing anything.
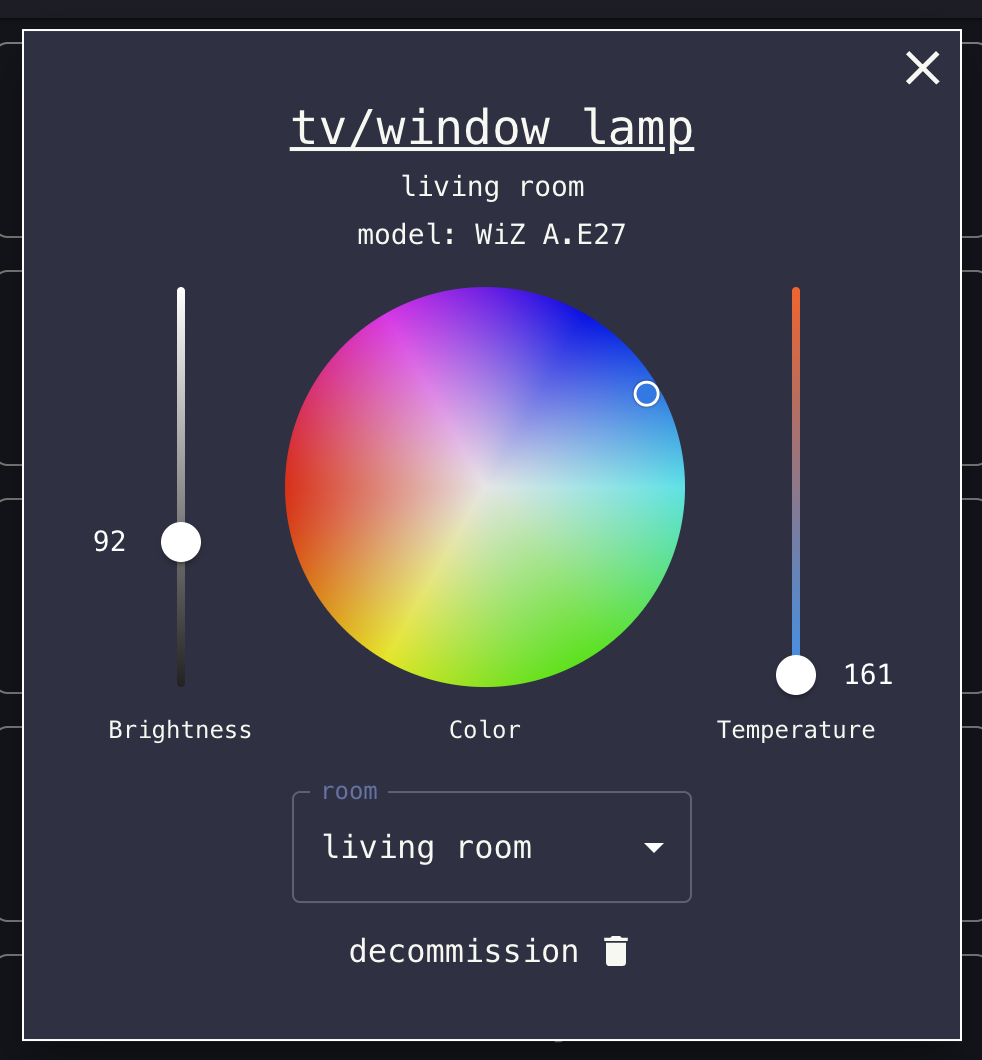
Modal I created to adjust the lamp’s settings
The color wheel is
@uiw/react-color-wheel
, and it’s the one part of the modal that required some thought. Dragging around it fires onChange continuously.
The first issue is that the color wheel and the Matter protocol speak different number ranges. Matter’s ColorControl cluster stores hue as 0–254 and saturation as 0–254. The color wheel uses standard HSV: hue 0–360°, saturation 0–100%. So you need to convert both ways — once when initializing the wheel from device state, and once when sending a wheel interaction back to the API.
Device state → wheel initialization:
const [color, setColor] = useState({
  h: Math.round((device.hue / 254) * 360),
  s: (device.saturation / 254) * 100,
  v: 90,
  a: 1,
})
Wheel interaction → API call (inside the mutation’s mutationFn):
updateHueAndSaturation(
  id,
  Math.round((color.hsva.h / 360) * 254),
  Math.round((color.hsva.s / 100) * 254),
)
The second issue is that a continuously-firing onChange would flood the controller with requests — one per rendered frame. To fix it I added debouncing. The update is wrapped in a 300ms debounce using
lodash/debounce
, held in a useRef so it doesn’t get recreated on every render:
const debouncedUpdate = useRef(
  debounce((value: ColorResult) => {
    handleHueAndSaturationUpdate({ id: device.id, color: value })
  }, 300),
).current
The onChange handler updates local color state immediately (so the wheel feels responsive) and passes the new value to debouncedUpdate. The actual API call only fires 300ms after the user stops moving.
Deployment #
The Dockerfile is a three-stage build. The first stage is base, which installs dependencies. The build stage copies the source and runs npm run build. The production stage is nginx:alpine — it copies the compiled dist/ and drops in a minimal nginx config.
The build stage uses --platform=$BUILDPLATFORM on the dependency and compile stages, same as described in the CI/CD post. Only the final nginx:alpine stage targets arm64. The frontend runs as a service in the same Docker Compose file as the controller.
Every lamp is now controllable from the browser. The dashboard is accessible at nanomatter.kaoshome.dev from any device on my tailnet.