Building a VPN-first homelab on a Raspberry Pi
Part 1 of the homelab series: setting up a Raspberry Pi with Tailscale for secure, private remote access.
- published
- tags
- #Raspberry-Pi #Tailscale #Docker #Homeserver #Self-Hosting
- categories
- Homelab
A few months ago I started thinking about a small electronics project: a sensor on my mailbox that would notify me when new mail arrived. Nothing fancy — a microcontroller, a magnetic reed switch, a push notification to my phone.
But then I started thinking bigger. If I’m building a notification system anyway, why not a grocery list app too? I’d been wanting to build one for a while to keep track of my expenses. I also wanted to integrate automated garden irrigation, smart lighting controlled via Matter and Zigbee protocols and other home automations.
That’s how KAOS started: not with a grand vision but by following one idea until it became several. I needed a centralized environment for all of this, which meant setting up a homelab.
Why a Raspberry Pi?
There are a few ways to run a home server. You could rent a cloud VM (cheap, but you’re paying forever and giving up physical ownership). You could repurpose an old laptop or desktop (free, but noisy, power-hungry and you might actually want that machine back someday). Or you could use a Raspberry Pi.
The Pi made sense to me for a few reasons:
- Power draw: A Raspberry Pi 4 draws around 3–5W under typical load. Running it 24/7 adds maybe 5 CHF/month to my electricity bill. A desktop under light load draws 10–20x that.
- Size: It fits in my hand. I mounted it next to my router and forgot it was there.
- Always-on: No sleep mode, no spinning fans to fail, no display to burn in. It just runs.
- Learning experience: I’d been wanting to set up a home server for a long time and finally used it as an excuse to dive into a bunch of new technologies.
- Convenient: I already had a Raspberry Pi 4 lying around! It was free since I needed it for my job and my company bought it for me. The whole starter kit for the Raspberry Pi Model B 4 GB cost 119 CHF on Digitec .
The tradeoff is raw performance — you won’t be running anything compute-heavy on it. But for serving web apps, managing containers, and home automation, it’s more than enough.
Check my current setup below:
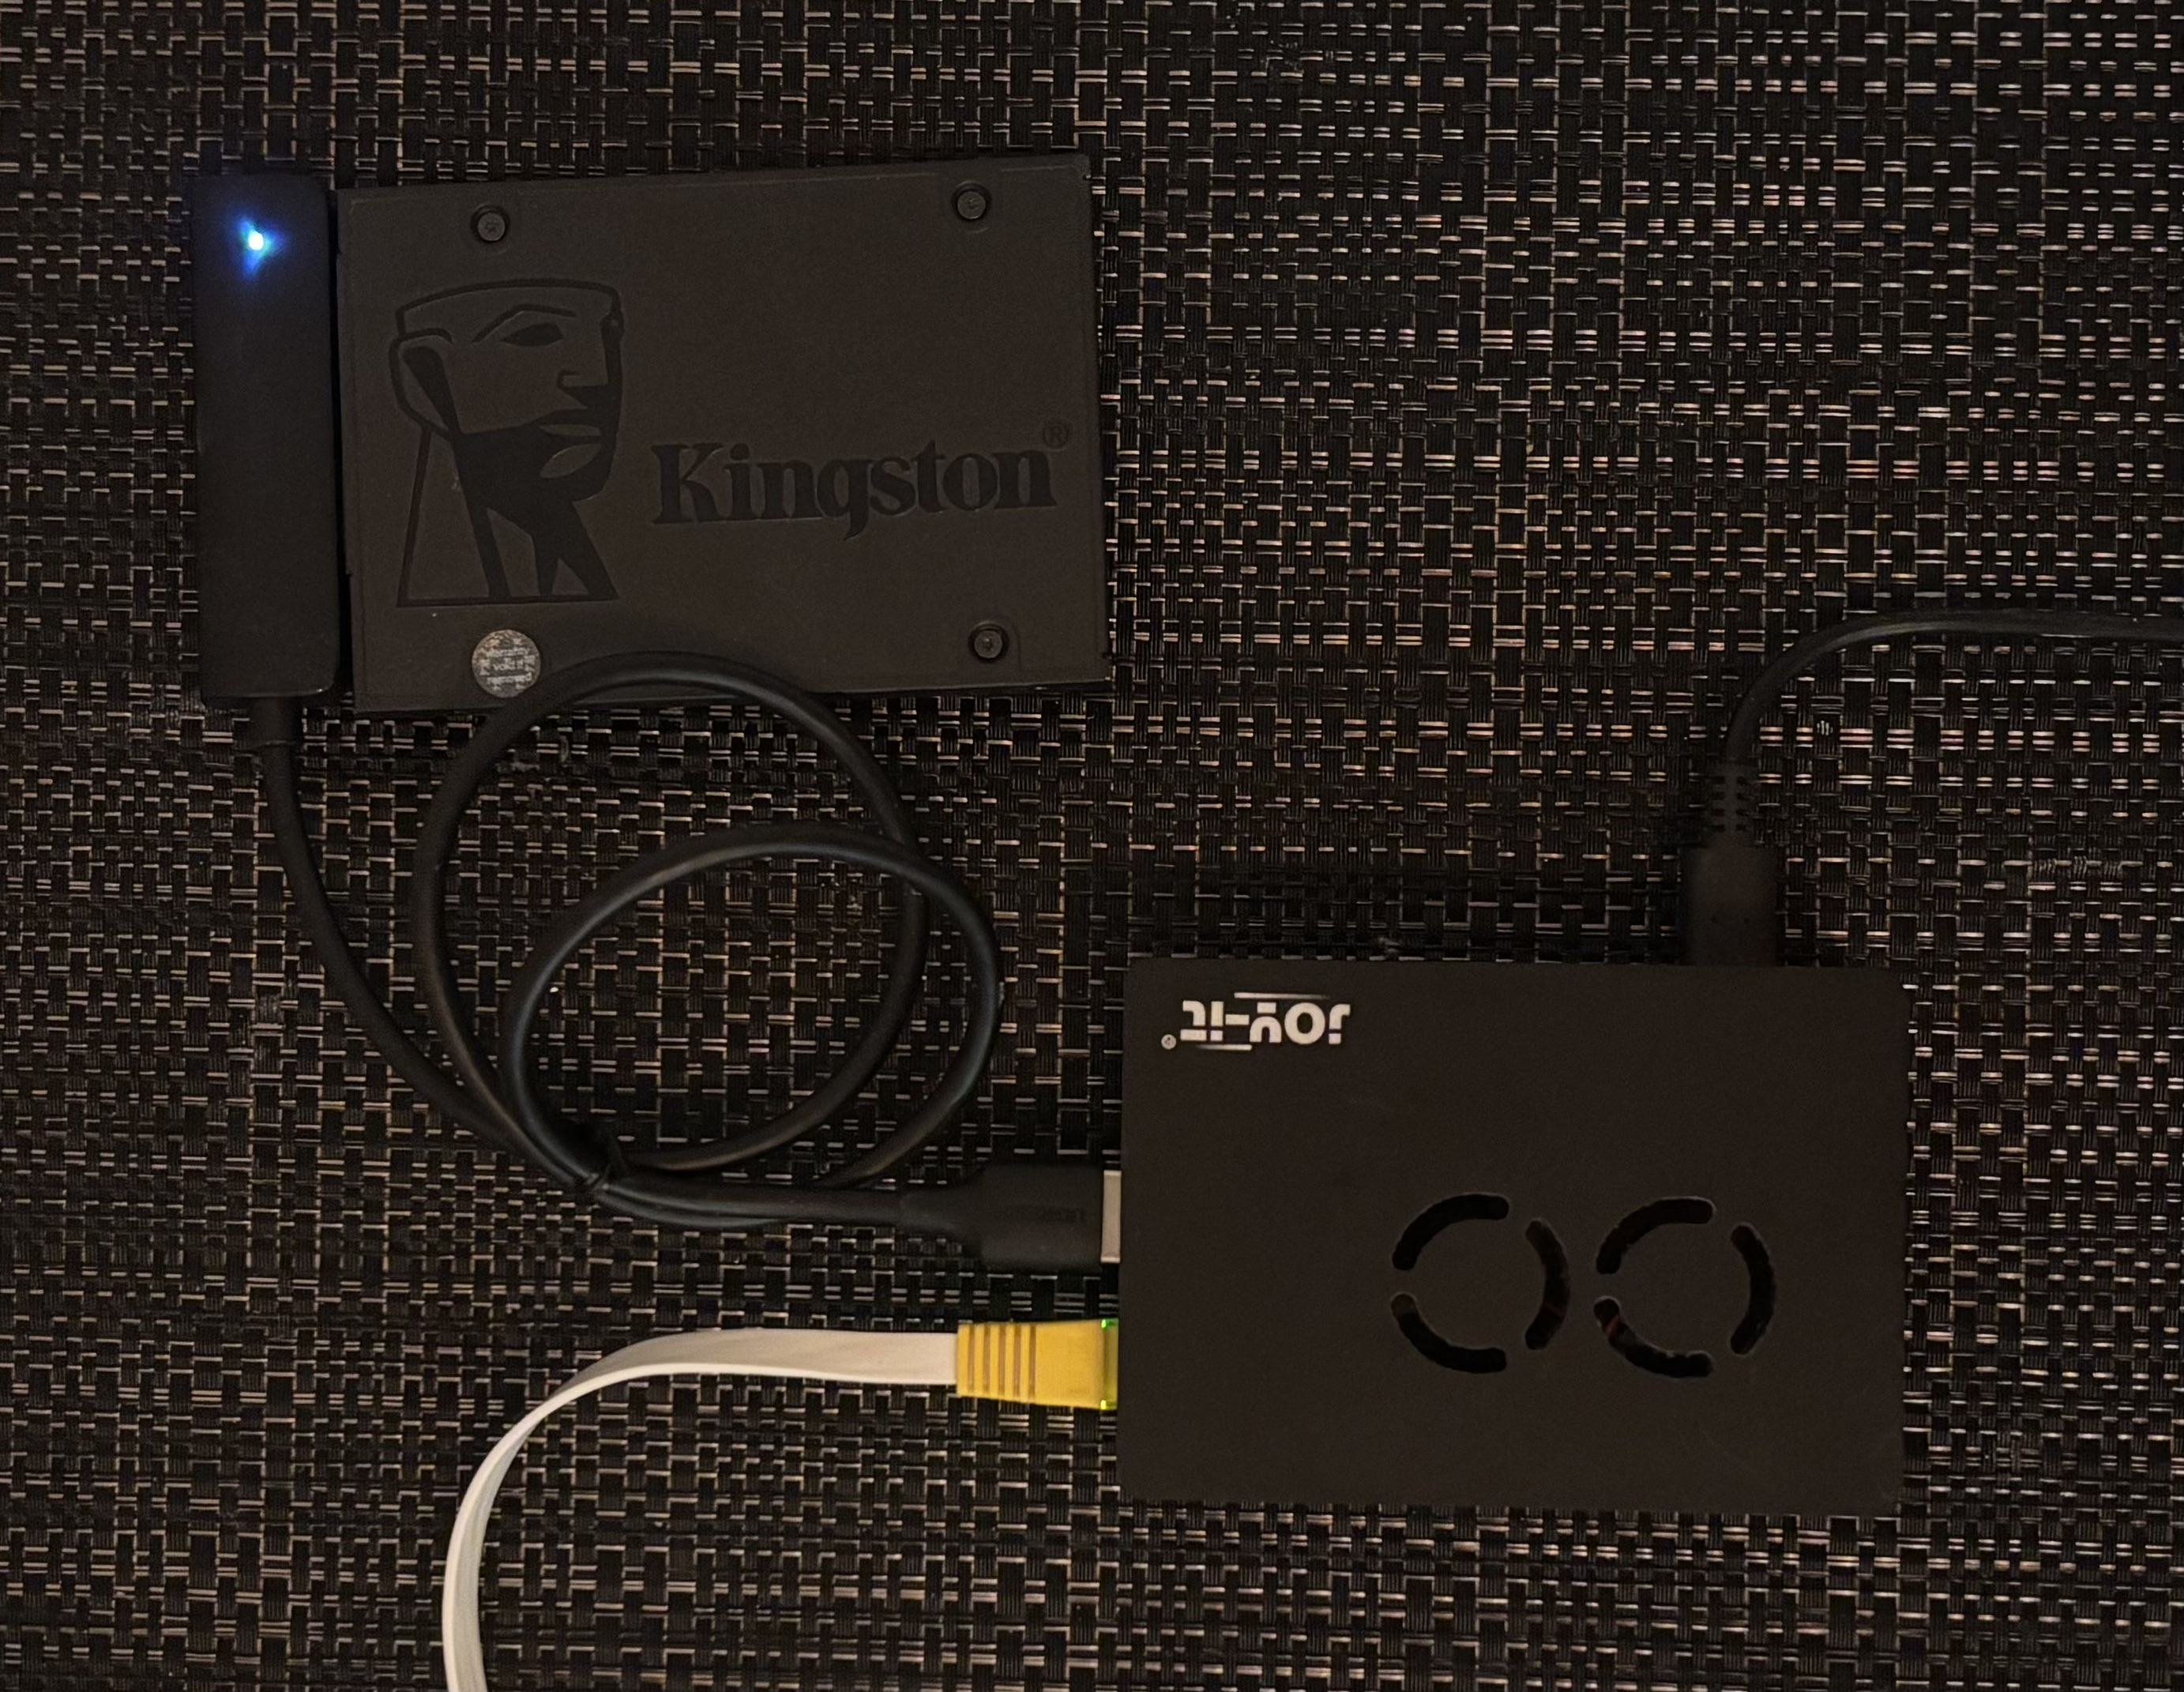
It has the following items:
- Raspberry Pi 4 Model B
- Joy-it Acrylic case with fan
- Ugreen USB 3.0 to SATA 3.0 adapter for 2.5" SATA SSD
- Kingston A400
Note: I initially ran my Raspberry Pi on a good old microSD card but eventually upgraded to an SSD for better performance and reliability. If you’re considering the same upgrade, I recommend checking out James Chambers’ guide on the best SSDs and storage adapters for the Raspberry Pi 4 . If you’re migrating an existing setup rather than starting from scratch, you can use rpi-clone to copy your system from the microSD card to the SSD safely.
Setting up the Pi
I’m not going to go deep on the initial Pi setup since the official documentation covers it well, but here are the two things to do before anything else: enable SSH and assign a static IP.
For SSH, the Raspberry Pi Imager lets you pre-configure both before flashing the SD card. Set a username, password, and enable SSH from the “Advanced options” menu. This way you can plug the Pi in headlessly — no monitor, no keyboard — and SSH straight into it.
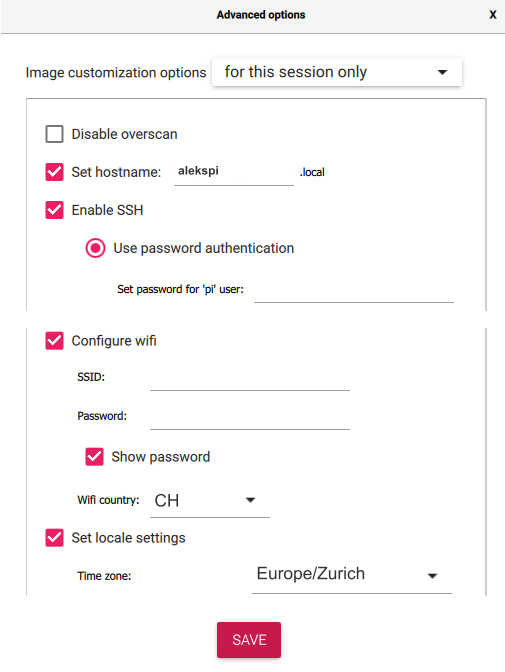
The Raspberry Pi Imager lets you configure SSH before flashing.
For a static IP, I set up a DHCP reservation on my FRITZ!Box 5530 Fiber. It’s as easy as checking an “Assign permanent IPv4 address” box. This is cleaner than hardcoding a static IP on the Pi itself: the Pi’s network config stays simple and the router stays the single source of truth. My Pi lives at 192.168.178.39.
I can SSH in with:
Then install Docker:
curl -fsSL https://get.docker.com | sh
sudo usermod -aG docker $USER
Log out and back in. Docker should be ready to use.
The naive approach: port binding
To verify everything works, I ran a simple container and tried to reach it from my laptop:
docker run -d -p 8080:80 nginx
Then opened http://192.168.178.39:8080 in a browser and there was the nginx welcome page.
That’s fine as long as I’m home. But the moment I leave my local network, 192.168.178.39 is completely unreachable. I’d have to open ports on my router and expose the server to the public internet, which I didn’t want to do.
Opening ports means the server becomes reachable from the entire internet — not just me. Automated scanners find open ports within minutes of them being exposed; it’s not paranoia, it’s just how the internet works. Every exposed port is an attack surface: misconfigured services, unpatched vulnerabilities, brute-force login attempts. For a personal homelab running a grocery list and home automations, that risk is simply not worth it. On top of that, I’d be tying my access to my home’s public IP address, which my ISP can (and does) change.
Note: honorable mention to Init7, my ISP, which actually offers a plan that allows you to set up a fixed IPv4 address . They are extremely tech-friendly and I highly recommend them if you live in Switzerland.
Tailscale: a VPN that doesn’t feel like a VPN
Tailscale
is a VPN built on top of
WireGuard
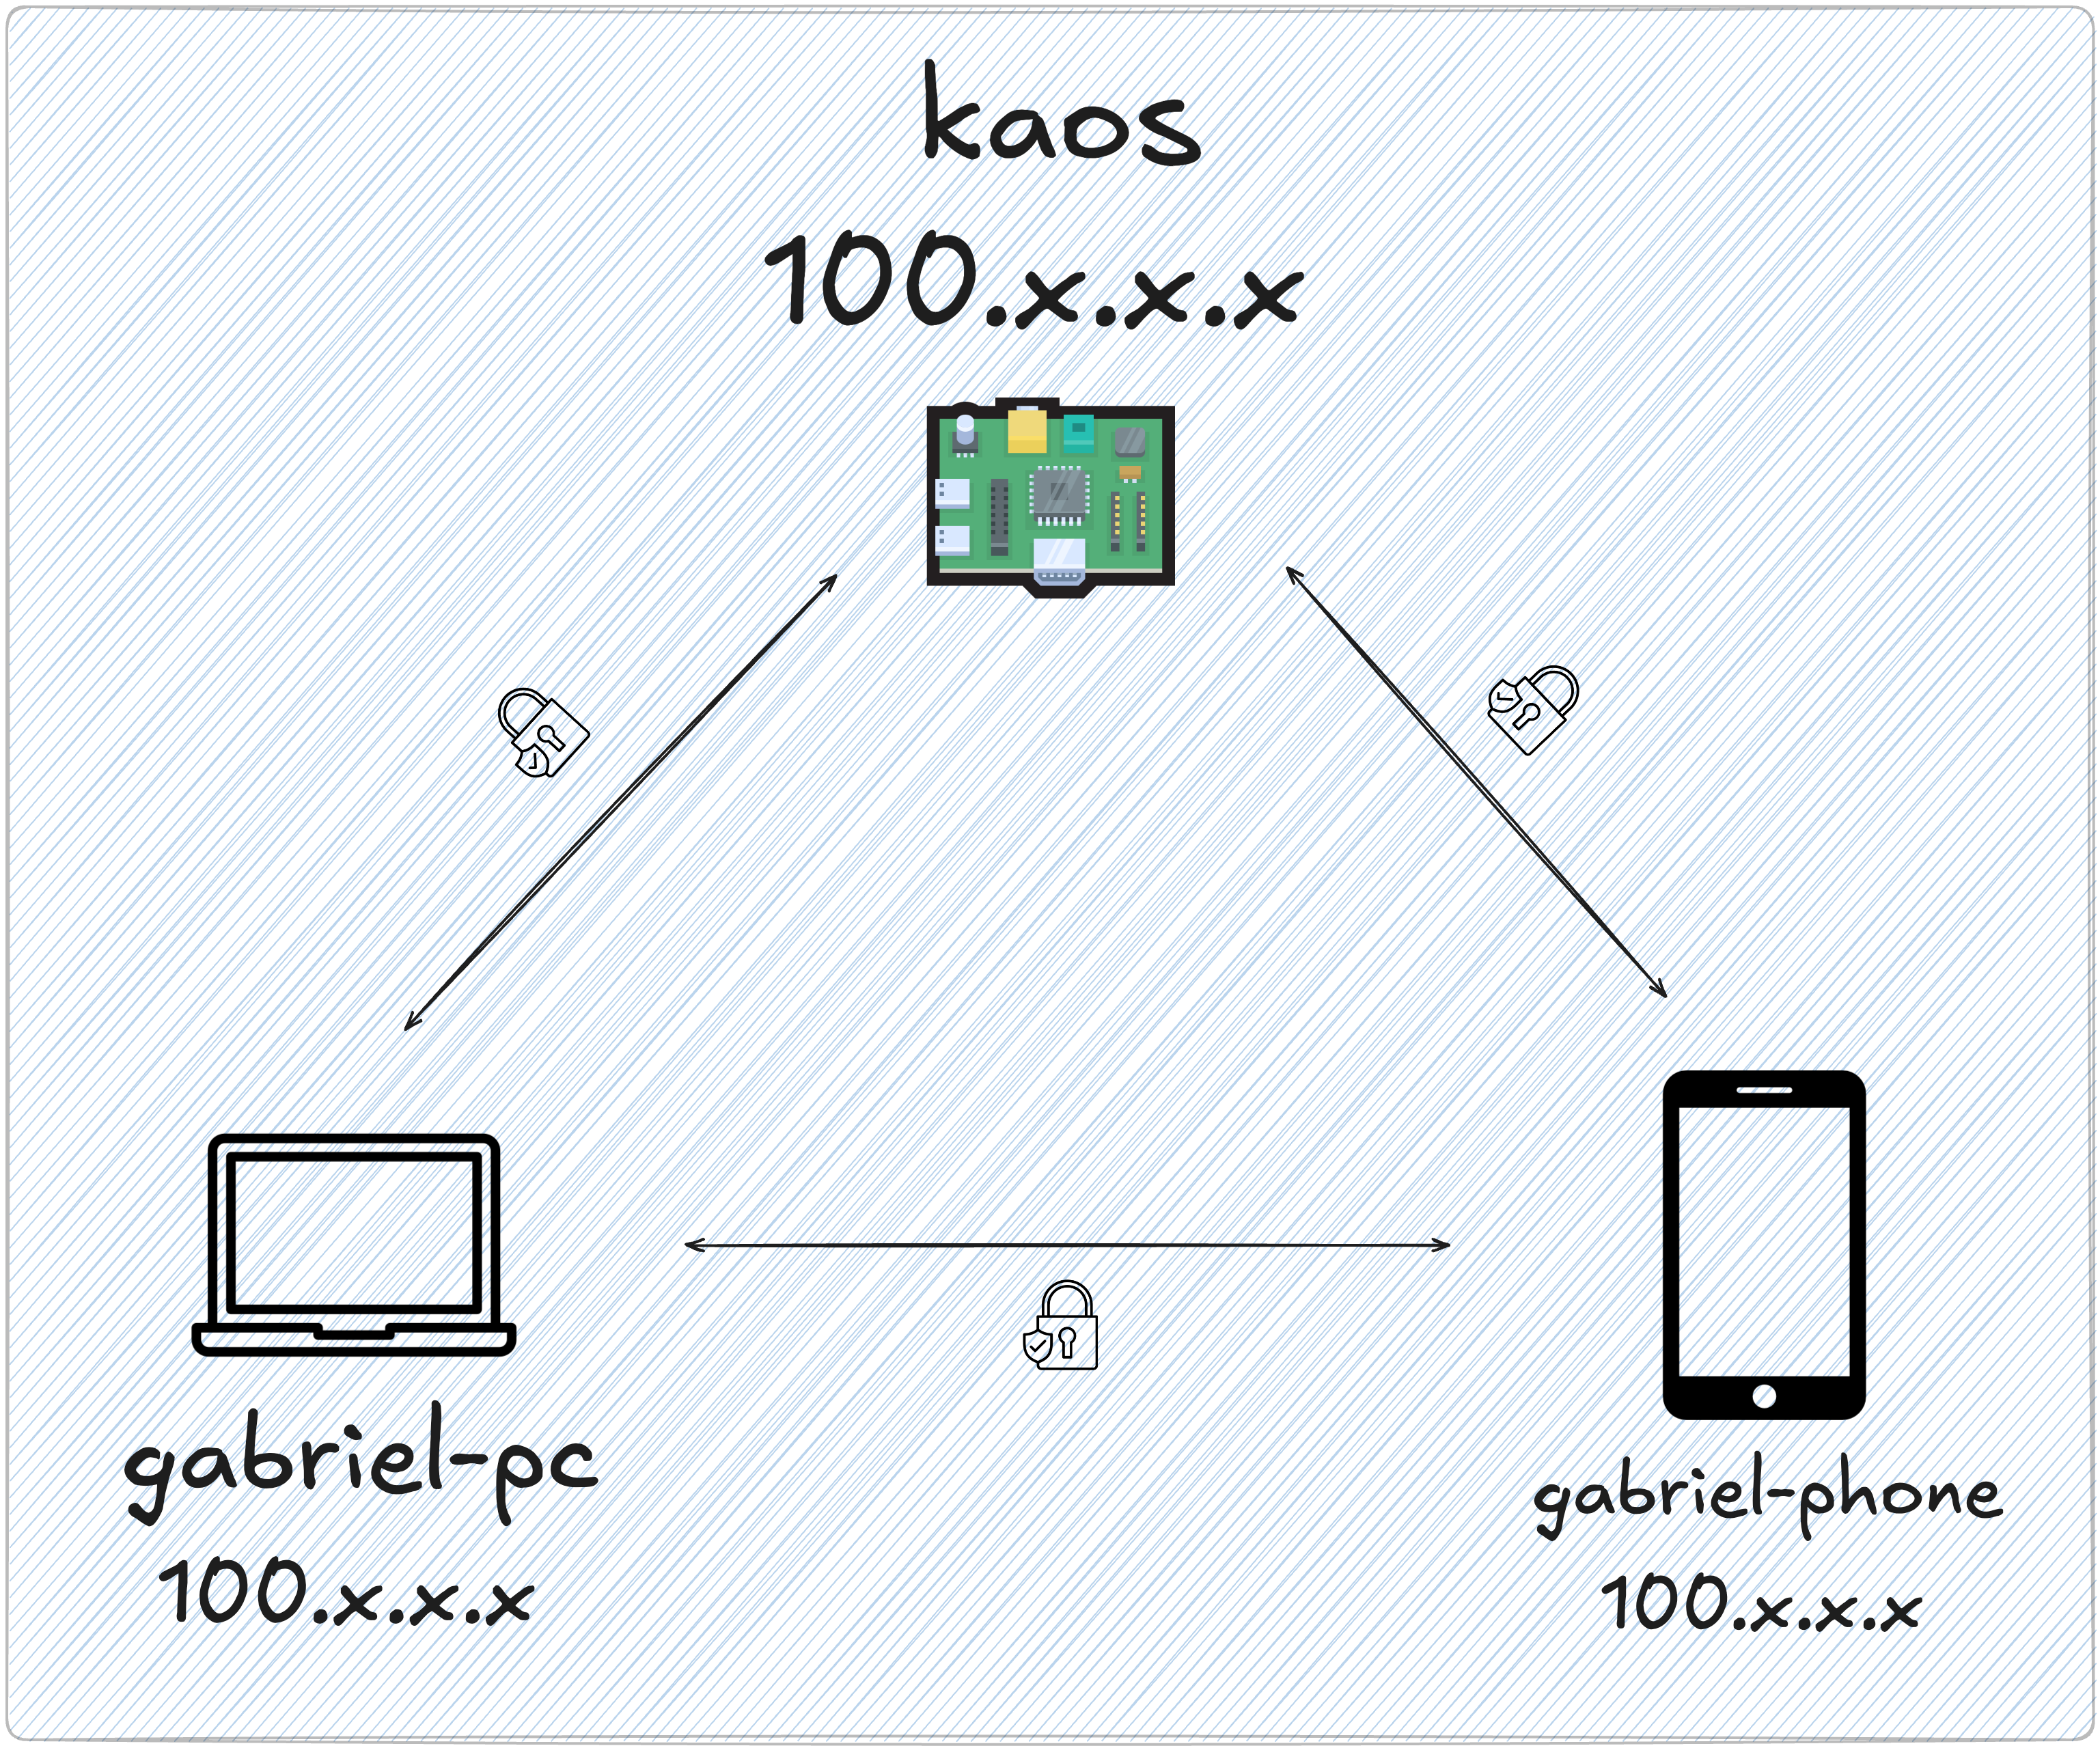
. What makes it different from a traditional VPN is that it doesn’t route all your traffic through a central server. Instead, it creates a mesh network where your devices connect directly to each other. Each device gets a private IP in the 100.x.x.x range and can reach any other device on the network regardless of which physical network they’re on.
Tailscale calls this your tailnet — your private overlay network. This becomes the foundation of the whole homelab access model: no ports open on the router, no public exposure, everything behind the tailnet.
All traffic between tailnet devices is end-to-end encrypted using WireGuard’s cryptography. Importantly, even Tailscale’s own servers can’t see your traffic — they act as a coordination layer to help devices find each other (think: a phone book), but the actual data flows directly between devices, fully encrypted. Only devices you’ve explicitly authorized can join your tailnet.
Check out the “What is Tailscale” page for more info on how it works.
Installing it on the Pi is two commands:
curl -fsSL https://tailscale.com/install.sh | sh
sudo tailscale up
The second command prints an authentication link. Open it, log in to your Tailscale account, and the Pi joins your tailnet. Then install Tailscale on your other devices — laptop, phone — using the native app for each platform. They all join the same tailnet automatically.
One thing worth noting: I run Tailscale directly on the Pi’s OS rather than inside a Docker container. Tailscale is infrastructure — it’s the network layer that everything else depends on. If it lived inside a container and Docker had a problem, network access would disappear too. Running it bare-metal on the host keeps it independent and resilient. The same reasoning applies to Pi-hole, which I’ll cover in the next post.
MagicDNS: hostnames for your tailnet
Once the Pi and my laptop are both on the tailnet, I can reach the Pi by its Tailscale IP (100.x.x.x). That works, but IP addresses are hard to remember. Tailscale has a feature called MagicDNS that solves this: it automatically assigns DNS names to every device on your tailnet based on the machine’s hostname.
Enable it in the Tailscale admin console under DNS → Enable MagicDNS. After that, every tailnet device gets a name. My Pi is named kaos, so it becomes reachable as just kaos from any other device on the tailnet:
ssh alekspi@kaos
That works from my laptop at home, from a coffee shop, from my phone on mobile data — anywhere Tailscale is running.
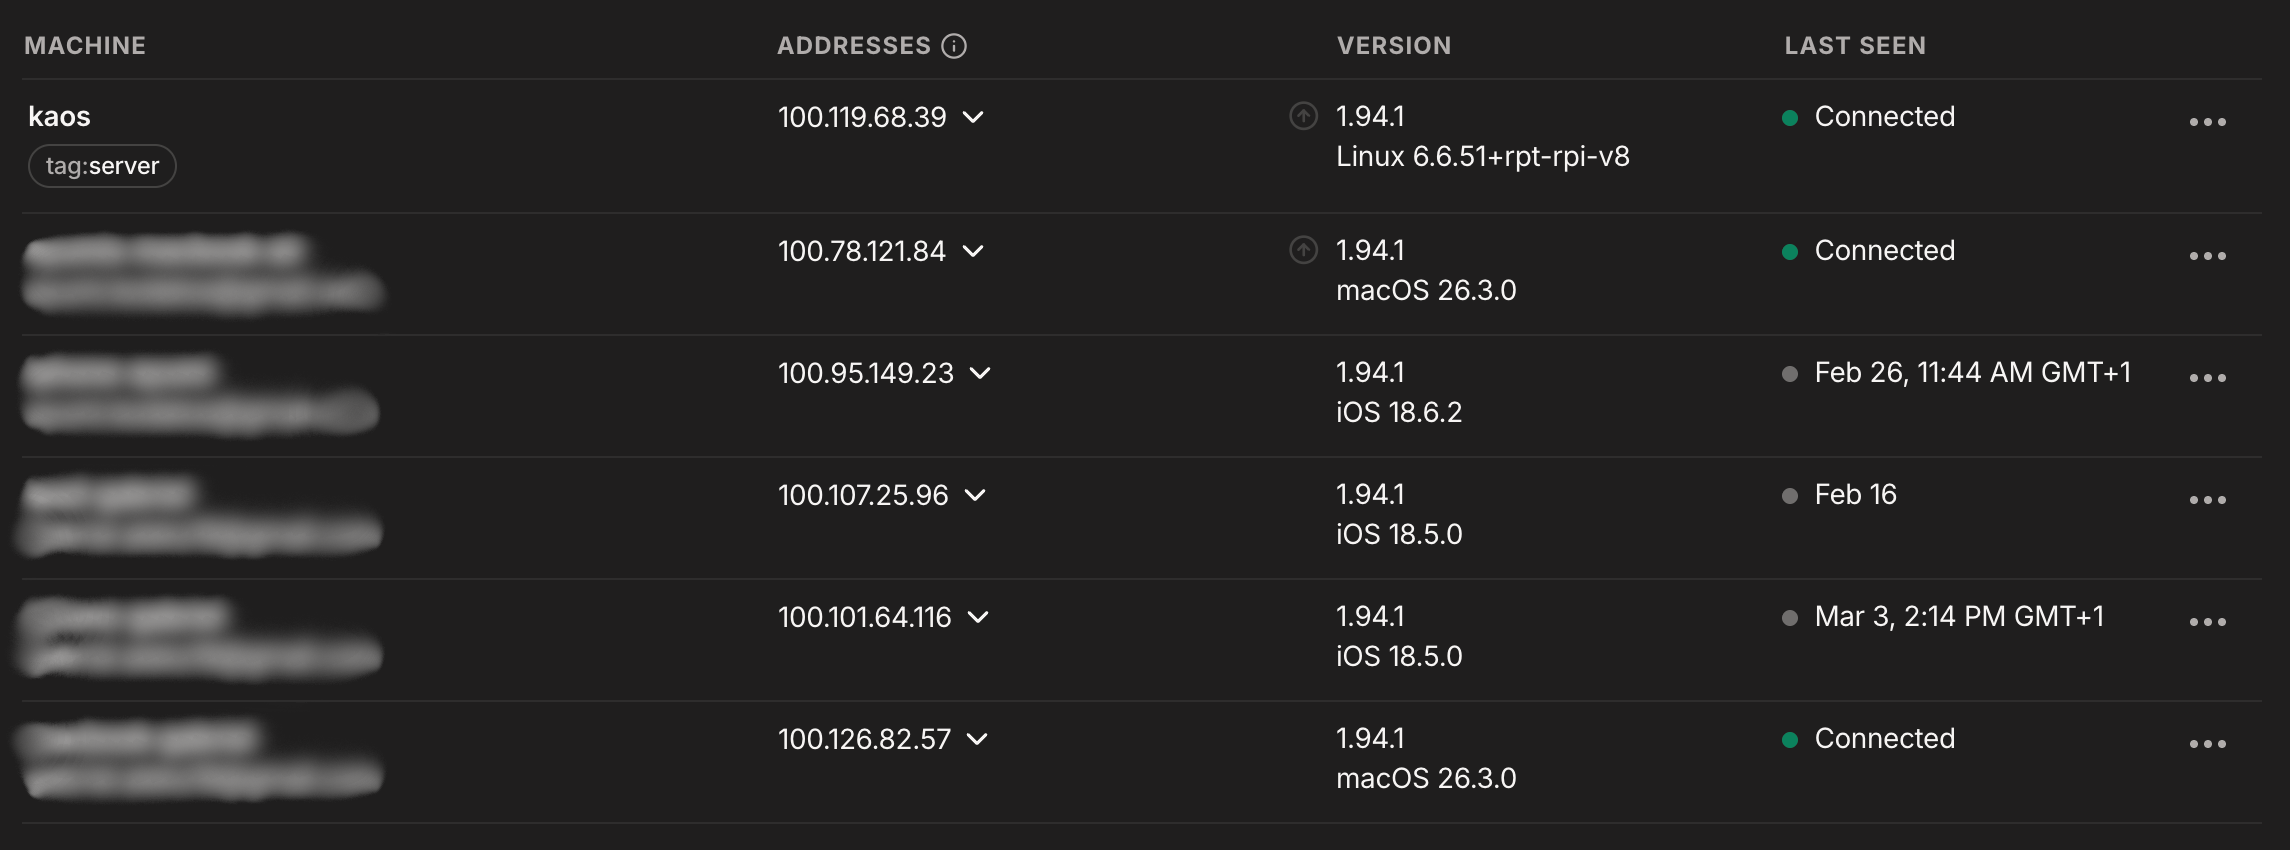
These are the devices connected to my tailnet. You can check this on https://login.tailscale.com/admin/machines .
And the nginx container from earlier? Instead of 192.168.178.39:8080, I can now access it at:
http://kaos:8080
No more memorizing IP addresses and it works from anywhere.
Where we are
At this point the setup looks like this:
- A Raspberry Pi running 24/7 with Docker
- Tailscale installed bare-metal, Pi joined to the tailnet
- MagicDNS enabled — all my devices can reach the Pi by name
- Services accessible at
kaos:<port>from any tailnet device, with no public ports open
This is a solid foundation. But kaos:8080, kaos:3000, kaos:9000 is still not ideal. Remembering which service lives on which port gets old fast, and there’s no HTTPS anywhere. In the next post, I’ll set up Pi-hole as a DNS server and Traefik as a reverse proxy — together they replace port numbers with clean subdomain addresses like portainer.kaoshome.dev.